Windows 11 is packed with features, but it’s essential to keep Microsoft’s latest desktop OS running smoothly. In this guide, we provide a dedicated tutorial on how to clear the cache in Windows 11. Following these steps will help you reclaim valuable storage on your Windows PC and address issues related to apps, networks, and the Microsoft Store. Let’s not waste any more time and learn how to clear the cache in Windows 11.
What is Chache on A Computer?
The cache is a small memory portion storing frequently used data, enhancing computer performance. Accessing the cache is faster than other memory parts. It holds commonly used data for running programs, speeding up their performance. Using the cache is good, but too much or a corrupted cache can slow down apps and use up memory. It’s a good idea to clear the cache regularly, especially on Windows 11, to keep your computer working well.
Method 1: Clear Cache in Windows 11 from Settings
The simplest way to clear cache in Windows 11 is through the Settings app. Microsoft has provided a comprehensive menu where you can locate all the cache and temporary storage files taking up space on your computer. This method allows you to effortlessly clear cache and free up storage on your Windows 11 PC. Here’s how to do it:
- Press the “Win + I” keyboard shortcut on Windows 11 to open the Settings app. Then, go to “System -> Storage.”
- Click on “Temporary files.”
- Your Windows 11 computer will take a moment to process all the files. Within a minute, it will display all the cached files stored on your computer, including the Downloads folder, Windows Update Cleanup, etc. Untick “Downloads” and click the “Remove files” button. That’s it! All cached files, whether related to a program or Windows Update, will be deleted.
Method 2: Clear App Cache in Windows 11 with %temp% Command
When you use an app on your Windows 11 PC, it stores its cached files in the temporary folder, known as the Temp folder. Sometimes, these files aren’t cleaned up automatically, taking up a significant amount of storage. To manually clear the app cache in Windows 11, you can delete the files inside the Temp folder using the following steps:
- Open the Run window using the “Win + R” keyboard shortcut. Type %tmp% and press Enter.
- Under the “Temp” folder, select everything and delete it. Keep in mind that you may not be able to delete some files currently in use by active apps, so leave them untouched. This method effectively clears most of the app cache on your Windows 11 PC.
Method 3: Clear Cache in Windows 11 using Disk Cleanup
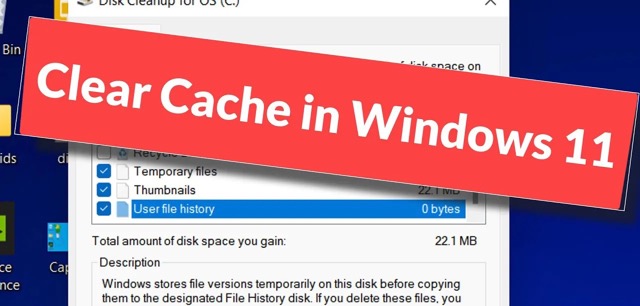
For those who prefer the traditional approach, you can clear the cache in Windows 11 using the legacy Disk Cleanup (or Clean Manager) tool. While the Windows 11 Settings app provides a modern interface, the Disk Cleanup tool offers a more familiar option for seasoned Windows users. To access the Disk Cleanup tool and clear cached items on Windows 11, follow these steps:
- Press the “Windows + R” keyboard shortcut to open the Run window. Type in “cleanmgr” and press Enter.
- A pop-up window will appear, asking you to select a drive. Choose the “C” drive and click “OK.”
- Click on “Clean up system files” in the next window. You may encounter the same pop-up as in the previous step; once again, select the “C” drive and press Enter.
- Scroll down and select all cached items, including temporary files, thumbnails, indexed logs, and more. You can also remove cached files related to Windows Update using this tool on your Windows 11 PC. Finally, click “OK,” and you are done.
Method 4: Flush DNS Cache in Windows 11
In addition to app cache, Windows Update cache, thumbnail cache, etc., Windows 11 also stores a DNS cache to quickly retrieve domain names from IP addresses. If you’re experiencing issues with a website not opening, clearing the DNS cache can help resolve network problems on your Windows 11 PC. Here’s how to flush DNS cache on Windows 11:
- Press the Windows key and type “command prompt.” Click on “Run as administrator” in the right pane to open the Command Prompt with Admin privileges.
- In the Command Prompt window, execute the following command to flush the DNS cache on your Windows 11 computer: “ipconfig /flushdns”
- Restart your PC after running the command, and you’re done.
Also, Read This: How To Access Bios On Windows 11
Method 5: Using a Third-Party Program to Clear the Cache on Windows 11
There are various third-party programs available that simplify the process of clearing all caches on your computer. These programs often offer options for selective deletion and scheduled automatic cleanup.
To use a third-party program, follow these steps:
- Download and install a cache-cleaning program on your computer.
- Type the program’s name into the Start Menu search bar and press Enter to open the app. Click on the app to open it and start using it to clear the cache on your computer.
- Once the app is open, you’ll find a scan button in the top right corner of the screen. Click on this button to start the scanning process.
- The app will scan your computer for caches and temporary files and then provide the option to clean them after the scan. Click on “Clean” to initiate the cleaning process.
You can use third-party apps to clean your Windows laptop or computer cache. Just remember to clear the cache only when needed and be careful when deleting files. Deleting files might remove temporary ones that your system and applications rely on to work properly.
FAQs
What is the Cache?
A cache is like a storage area on your computer where it keeps things it uses a lot, such as parts of websites and instructions for programs.
Why should I clear the Cache?
Clearing the cache can make your computer run better and create more space by getting rid of temporary data.
Conclusion
We’ve discussed everything about Cache and how to clear it on Windows 11. If you have any questions or concerns about this article, feel free to comment below.